Briar User Manual
What is Briar?
Briar is a messaging app designed for activists, journalists, and anyone else who needs a safe, easy and robust way to communicate. Unlike traditional messaging apps, Briar doesn’t rely on a central server - messages are synchronized directly between the users’ devices. If the internet’s down, Briar can sync via Bluetooth or Wi-Fi, keeping the information flowing in a crisis. If the internet’s up, Briar can sync via the Tor network, protecting users and their relationships from surveillance.
Installation
Briar is available on Google Play for devices running Android.
Tip: If you’re not sure whether you have an Android device, check whether it has the Play Store app. If it does, it runs Android.
If you have an Android device but you prefer not to use Google Play, the Briar website has instructions for installing the app via F-Droid or direct download.
Creating an Account
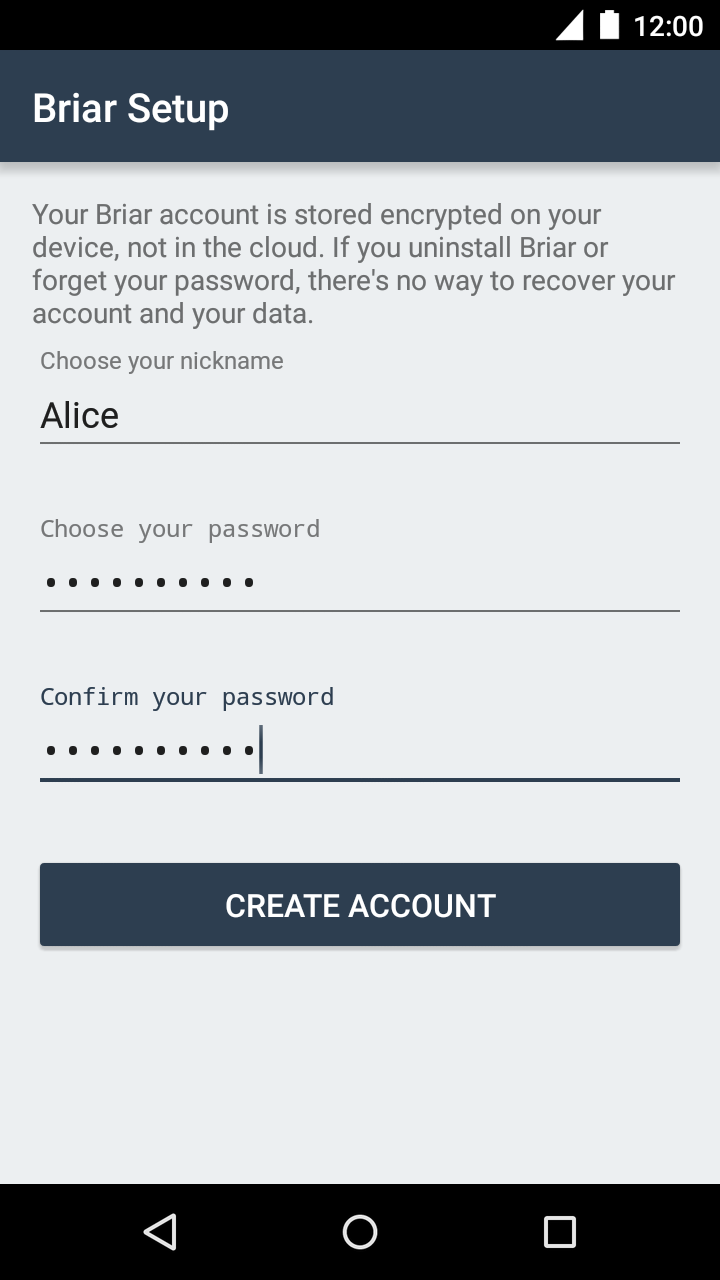
The first time you open Briar you’ll be asked to create an account. You can choose any nickname and password. The password should be at least 8 characters long and hard to guess.
Warning: Your Briar account is stored securely on your device, not in the cloud. If you uninstall Briar or forget your password, there’s no way to recover your account.
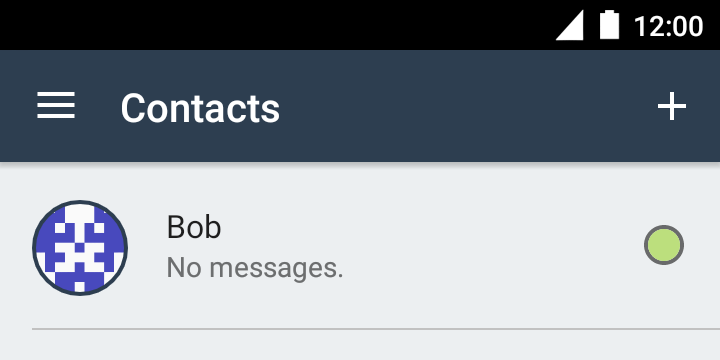
Tap “Create Account”. When your account has been created you’ll be taken to the contact list.
Adding Contacts
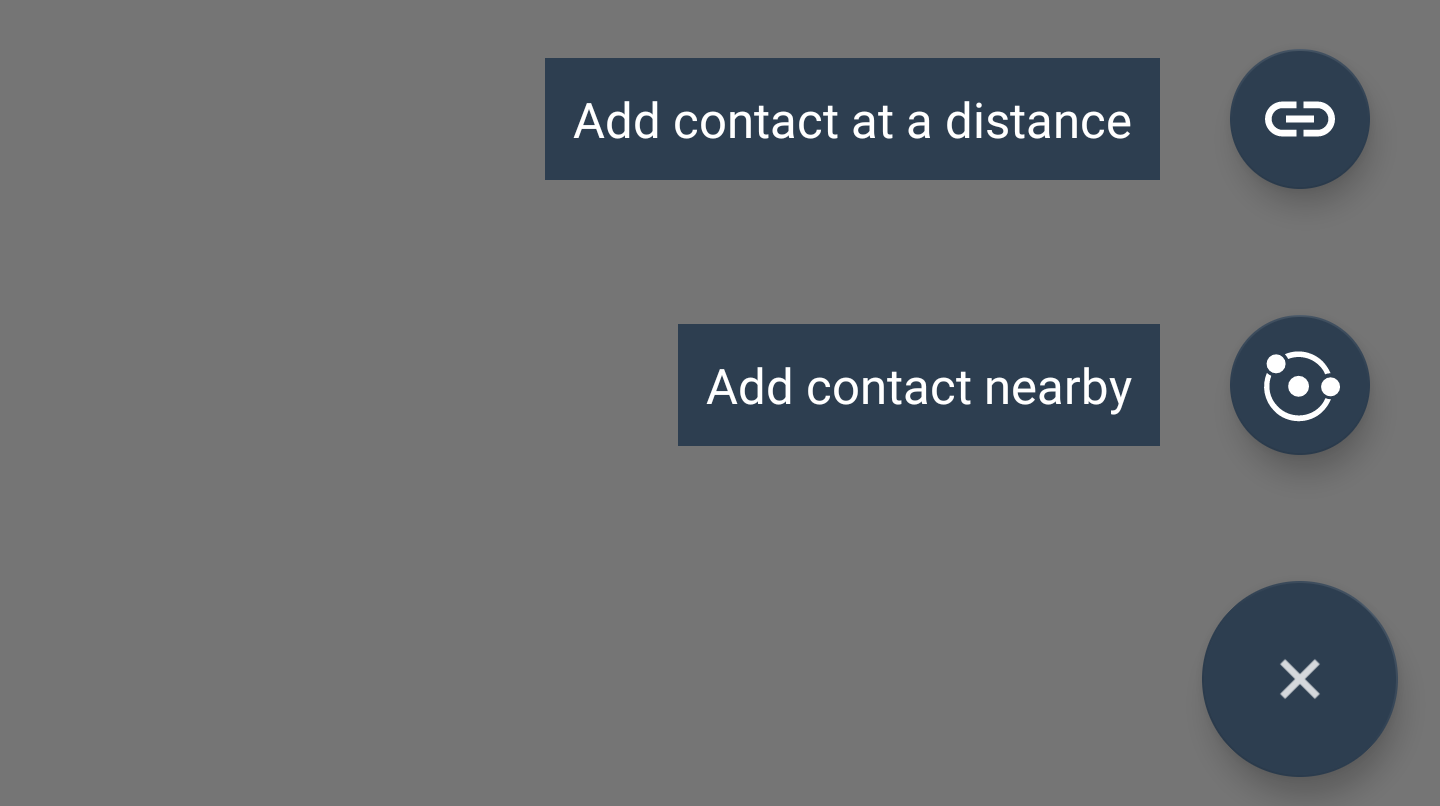
To add a contact, tap the plus icon at the bottom right of the contact list.
Choose one of the two options that appear.
Add contact at a distance
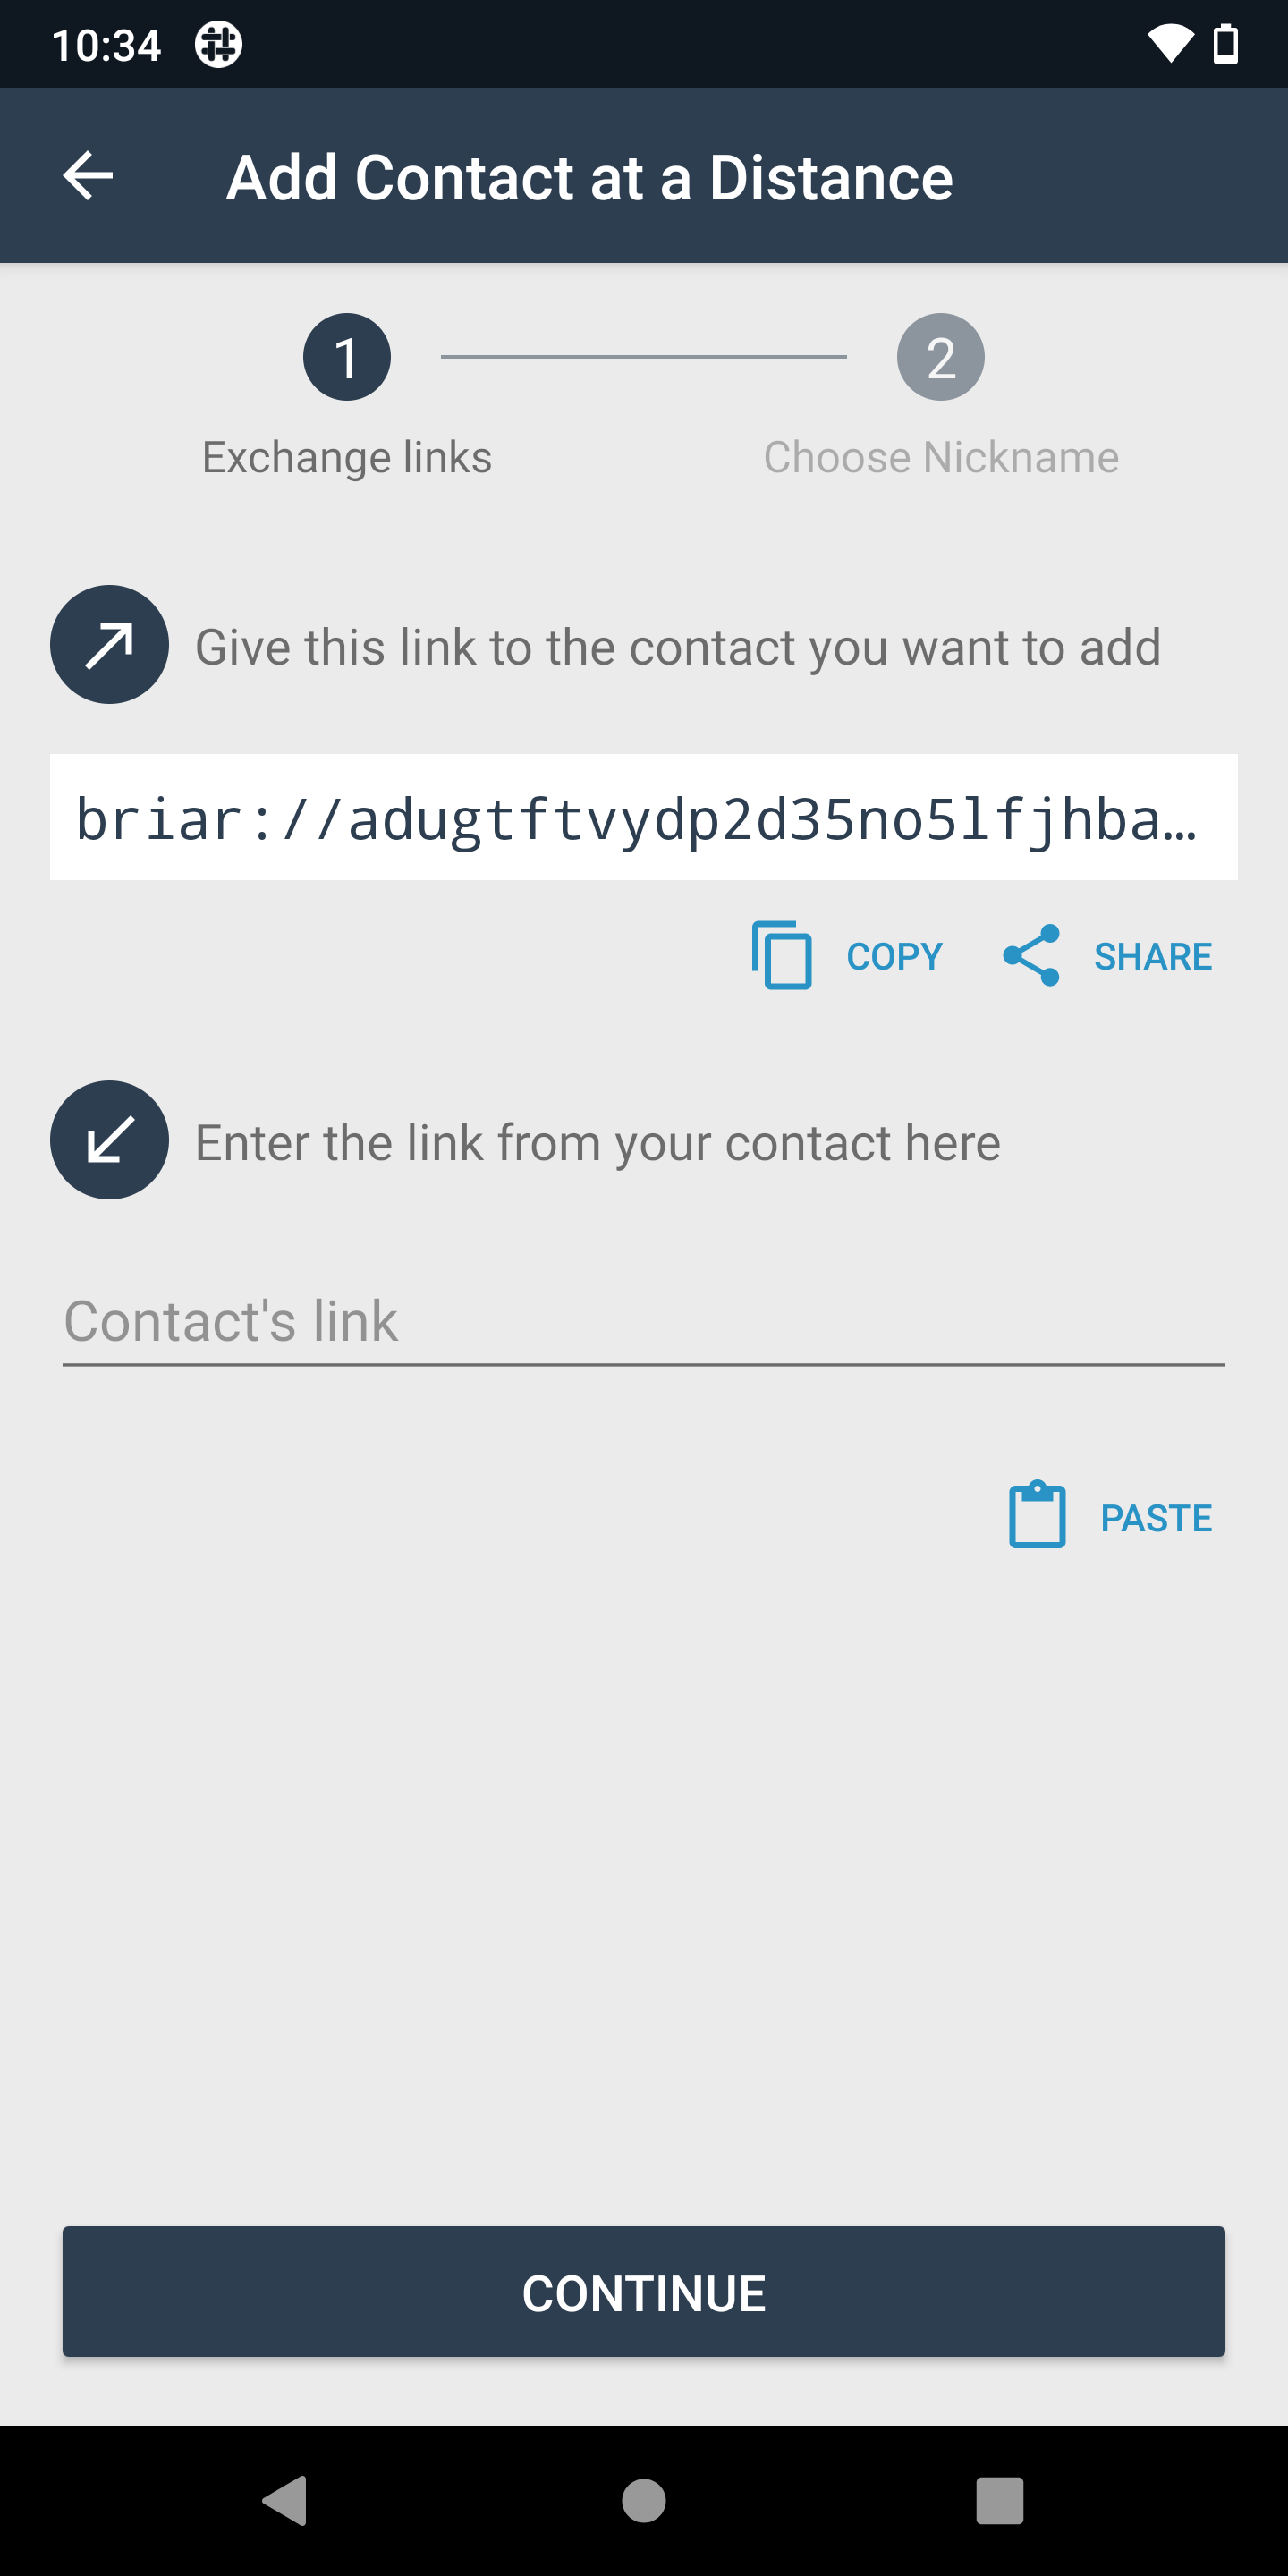
Copy the briar:// link and send it to the person you want to add. You can also use the “Share” button to choose an app for sending the link.
Paste the link that you receive from the person you want to add into the text field below. Click “Continue” and choose a nickname for the new contact.
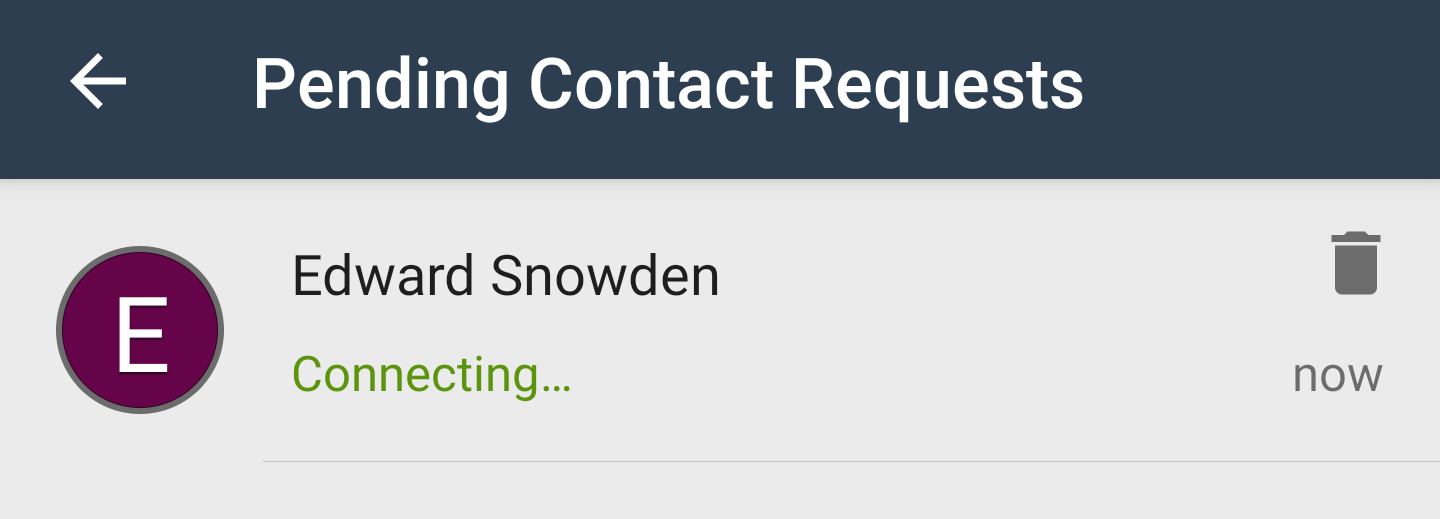
Next you will see a “Pending Contact Requests” screen that informs you about the state of each pending contact. Briar will try to connect to your contact regularly to add them.
Once a connection succeeds, you’ll be added to each other’s contact lists. Congratulations! You’re ready to communicate securely.
If Briar can’t connect to your contact after 48 hours, the pending contact list will show the message “Adding contact has failed”. Both of you should delete the pending contact from the list and add each other’s links again.
Add contact nearby
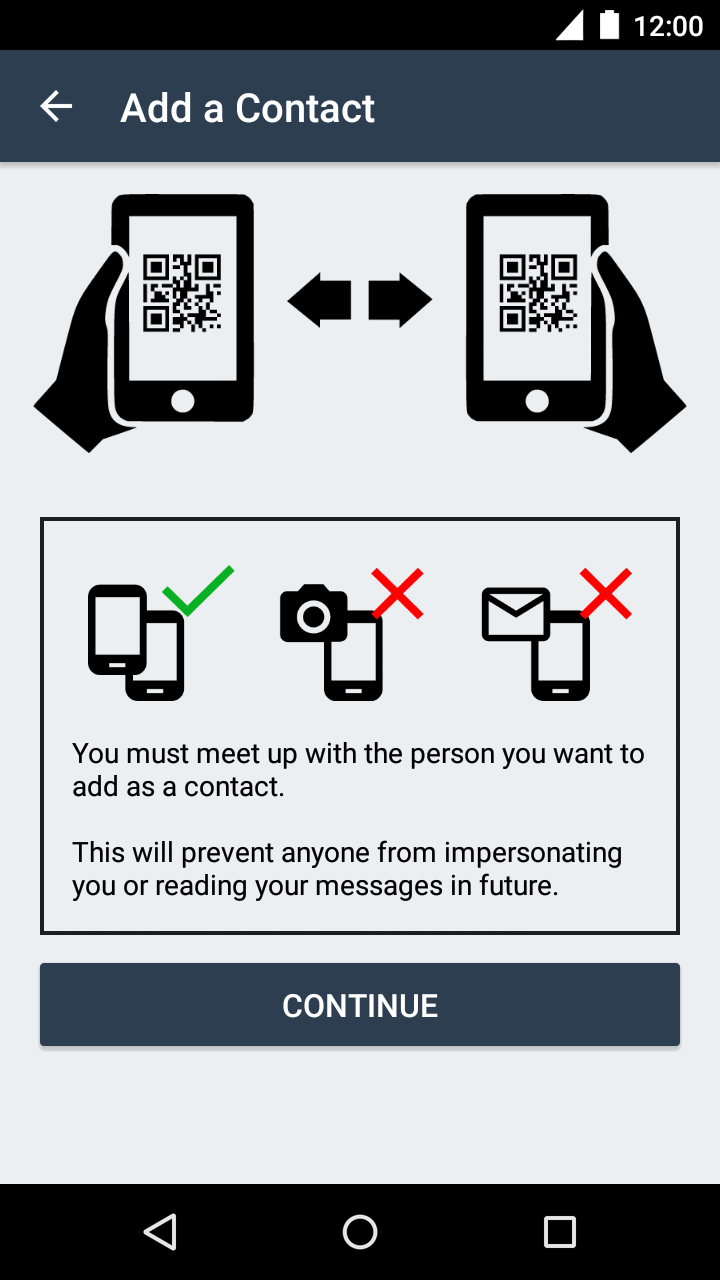
Another way to add a contact is to meet up with the person you want to add. Each of you will scan a QR code from the other person’s screen. This ensures you’re connecting to the right person, so nobody else can impersonate you or read your messages.
Tap “Continue” when you’re ready to start.

Line up your contact’s QR code in the viewfinder. You may have to wait a few seconds for the camera to focus.
When the camera has scanned the QR code you’ll see the message “Waiting for contact to scan and connect”. Now your contact should scan your QR code.
Your devices will exchange information, and after a few seconds you’ll be added to each other’s contact lists. Congratulations! You’re ready to communicate securely.
Messaging
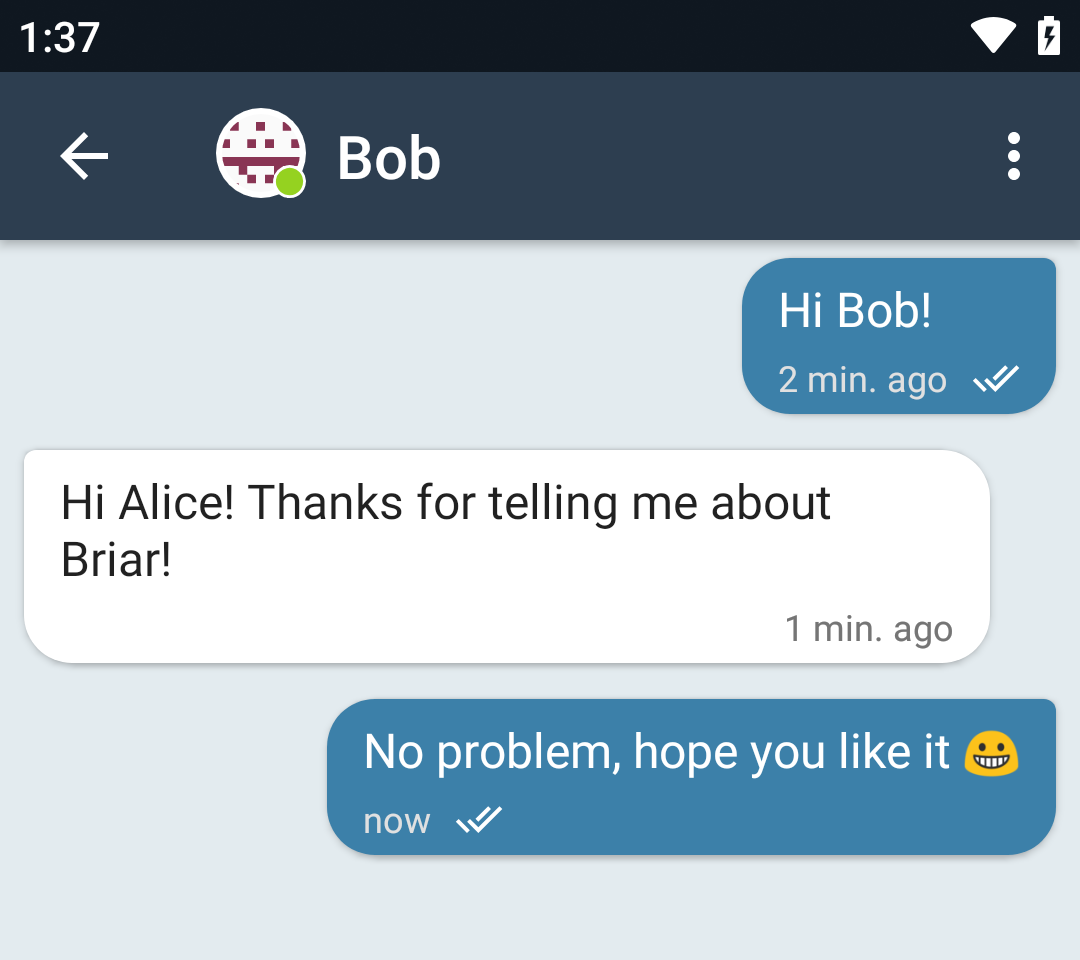
To send a private message, tap a contact’s name in the contact list.
Tip: All messages in Briar are end-to-end encrypted, so nobody else can read them.
If your contact is offline, your message will be delivered next time you’re both online.
Introducing Contacts

You can introduce your contacts to each other through Briar. This allows them to become contacts without having to meet up. To start an introduction, tap a contact’s name in the contact list and choose “Make Introduction” from the menu.
Next, choose the other contact you want to introduce.
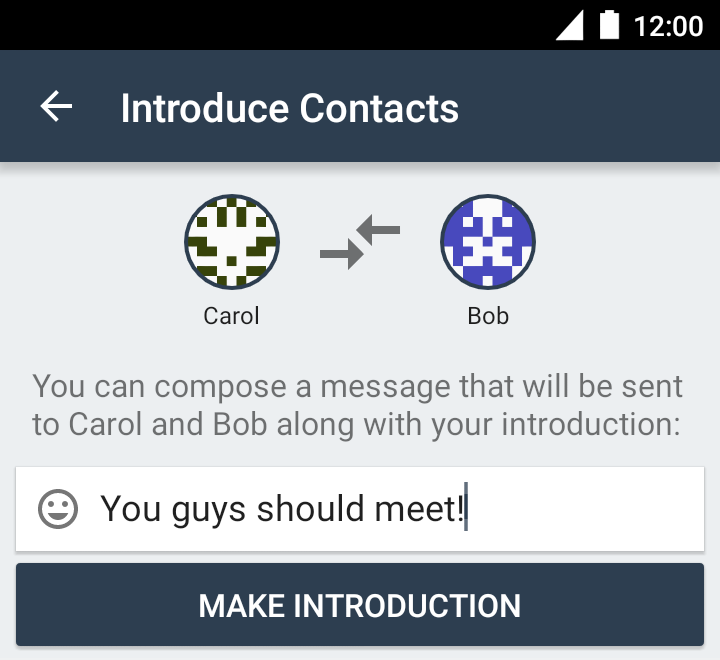
Add an optional message to the contacts, then tap “Make Introduction”.
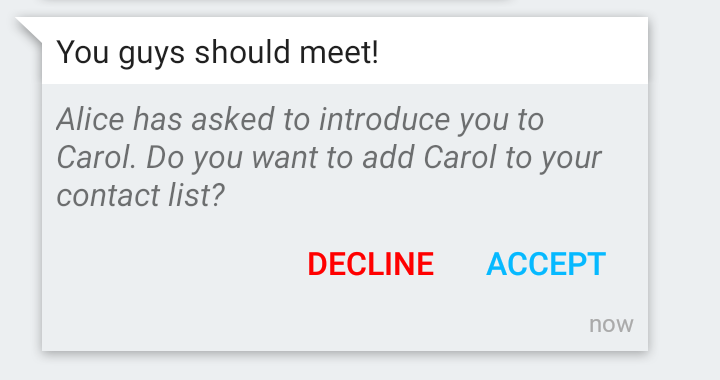
Your contacts will see a message asking them whether they accept the introduction. If they both accept they’ll be added to each other’s contact lists and they’ll be able to communicate securely.
Private Groups
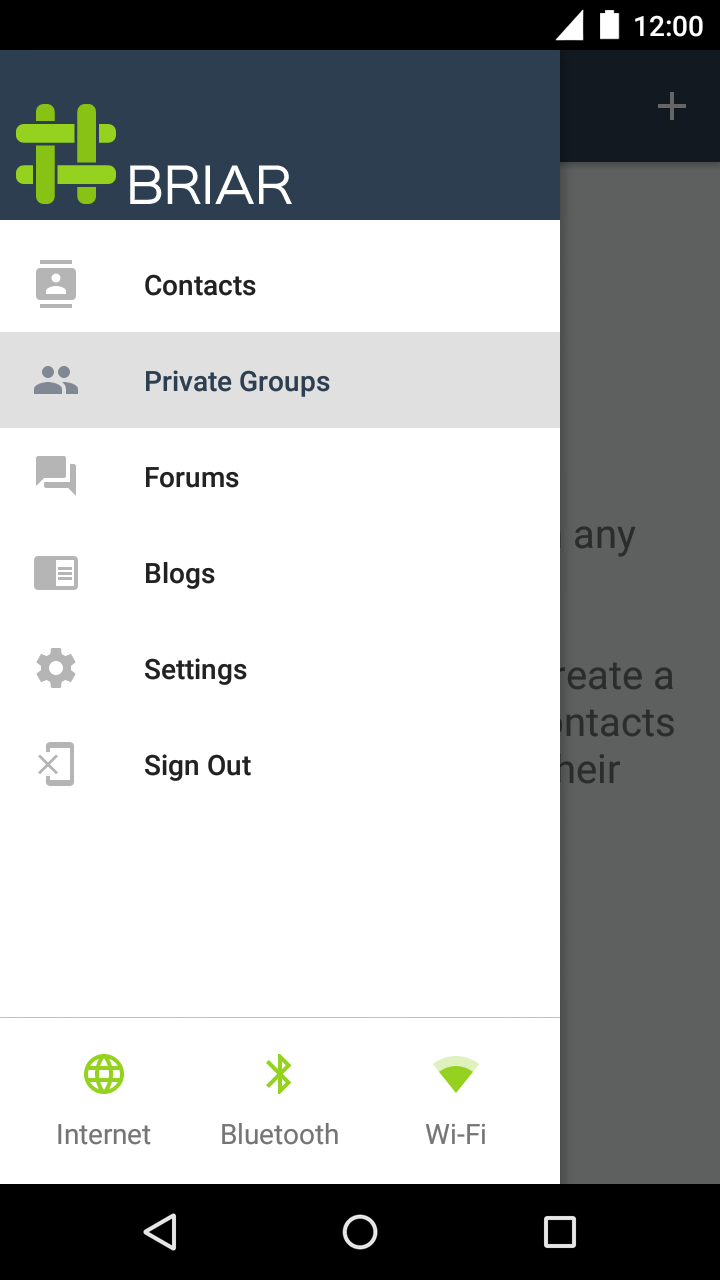
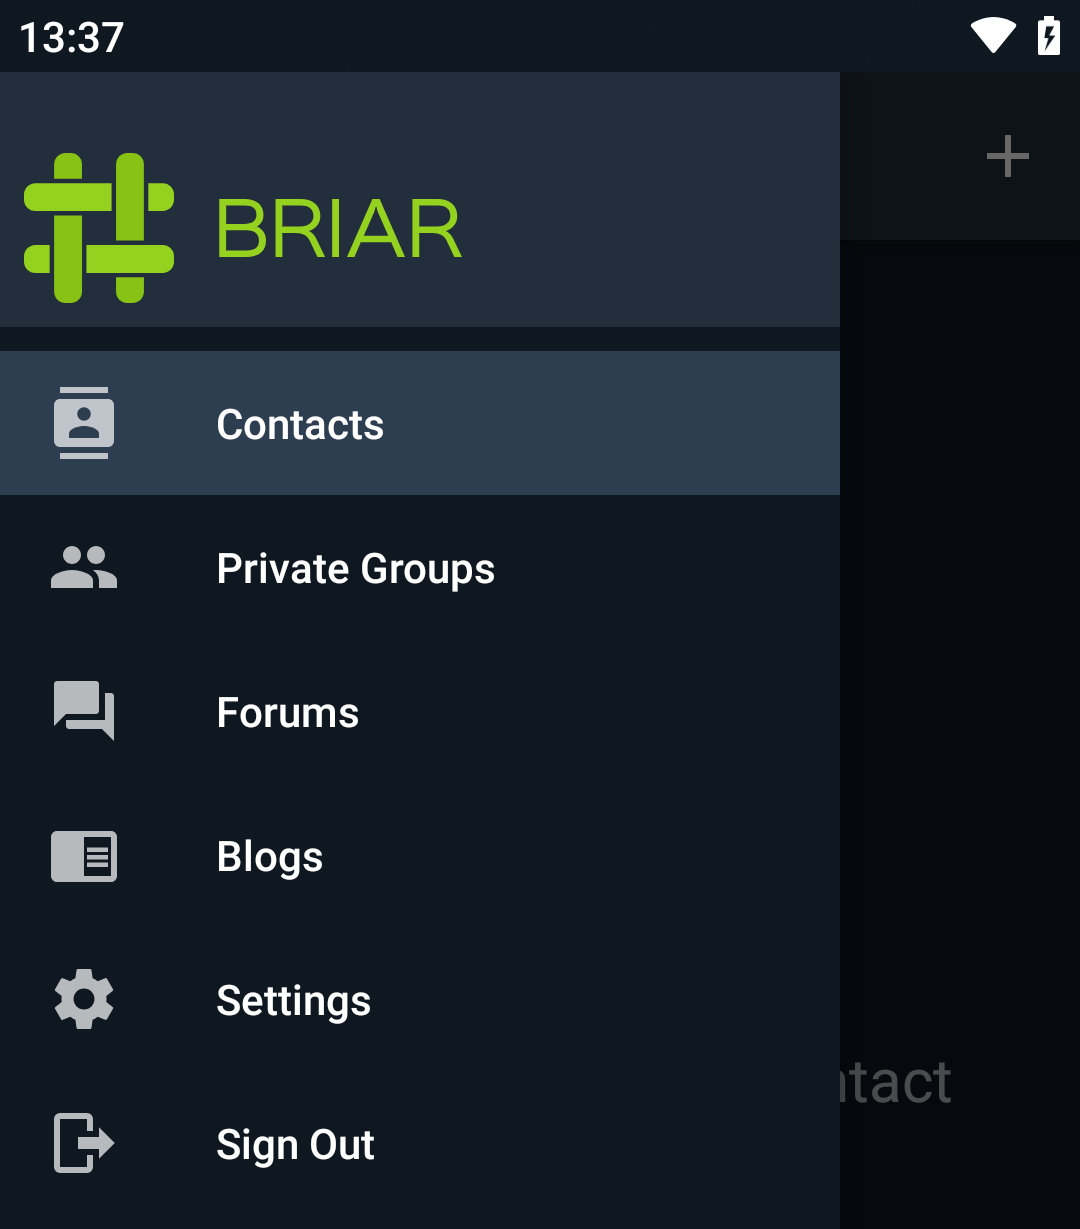
You can use Briar for group chats with your contacts. To create a group, open the main menu and choose “Private Groups”. The private group list will open. Tap the plus icon to create a new group.
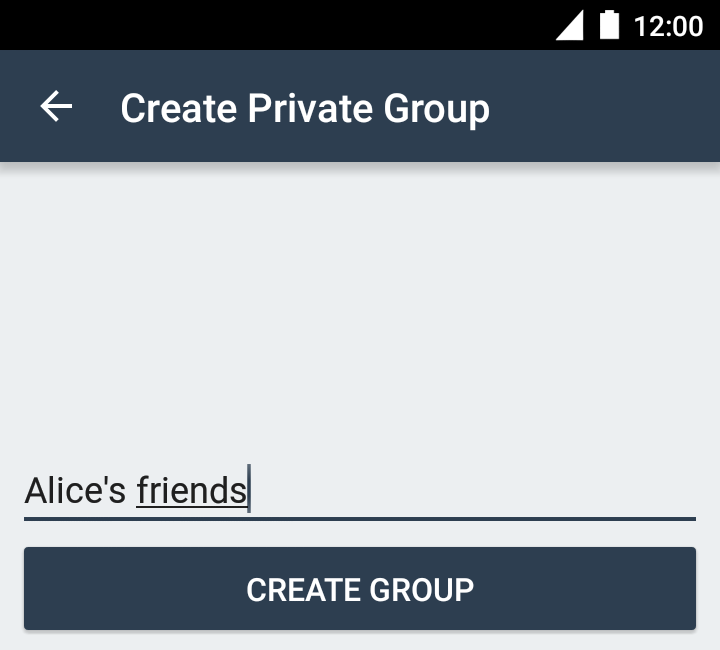
Choose a name for your group, then tap “Create Group”.
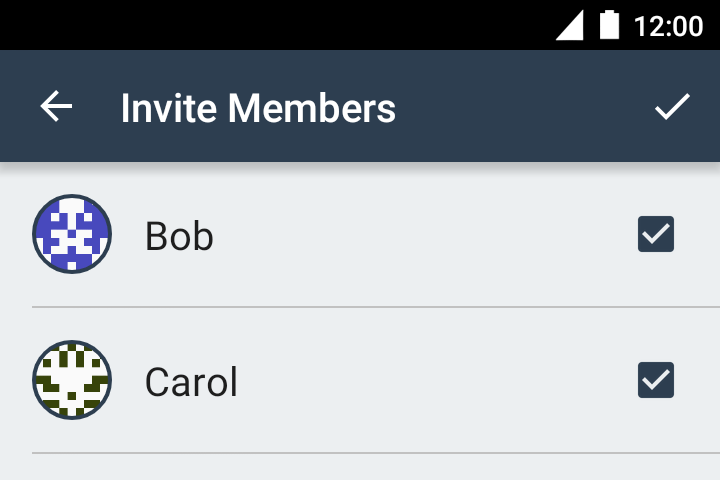
Next choose the contacts you’d like to invite to join the group. Press the checkmark icon when you’re done.
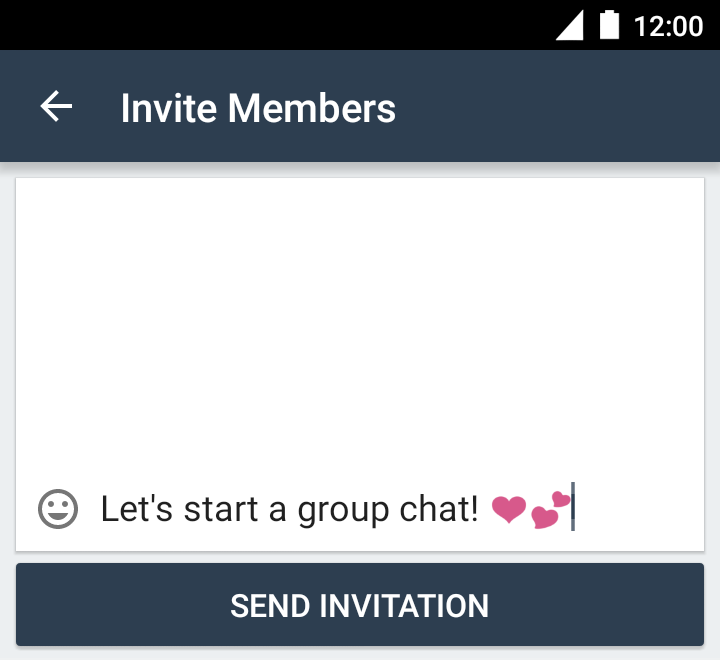
Add an optional message to the chosen contacts, then tap “Send Invitation”. The contacts will see a message inviting them to join.
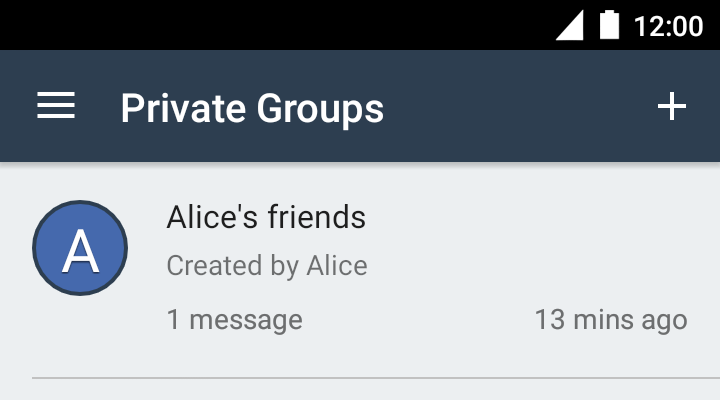
The new group will be added to your private group list. This list shows all the groups you belong to.
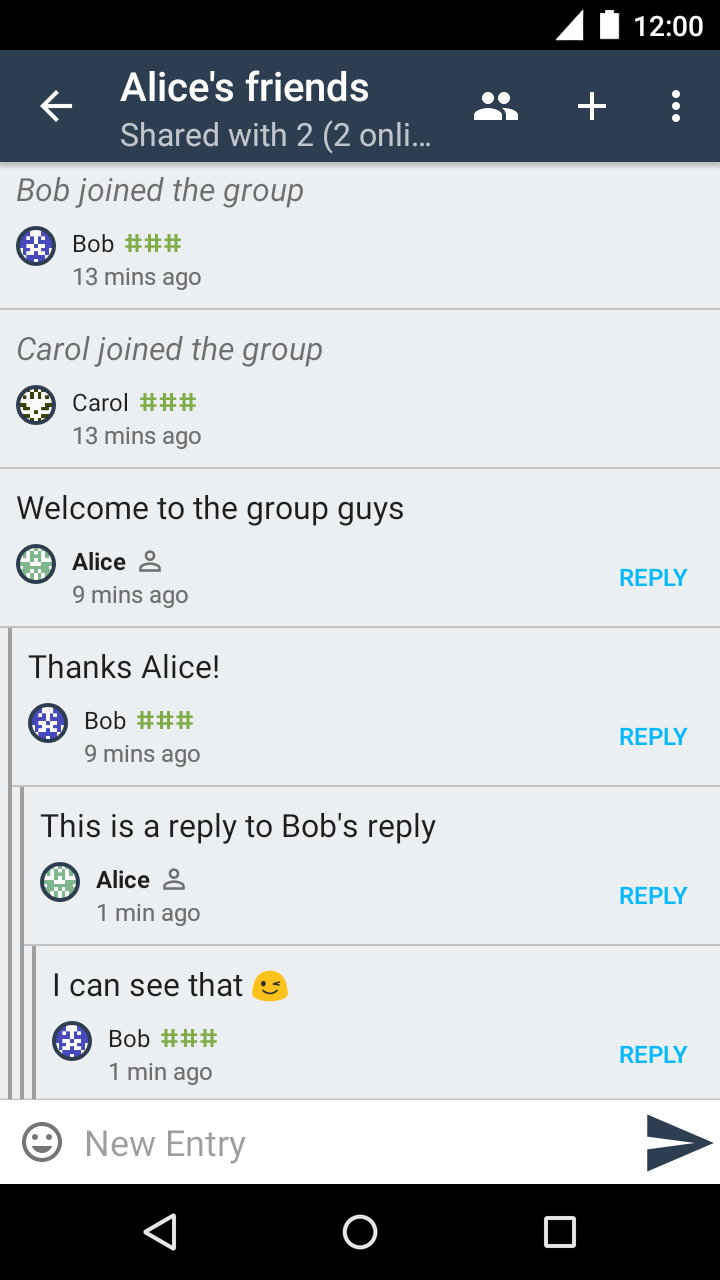
Messages in private groups are organized into threads. Any member can reply to a message or start a new thread.
The creator of the group is the only one who can invite new members. Any member can leave the group. If the creator leaves, the group is dissolved.
Forums
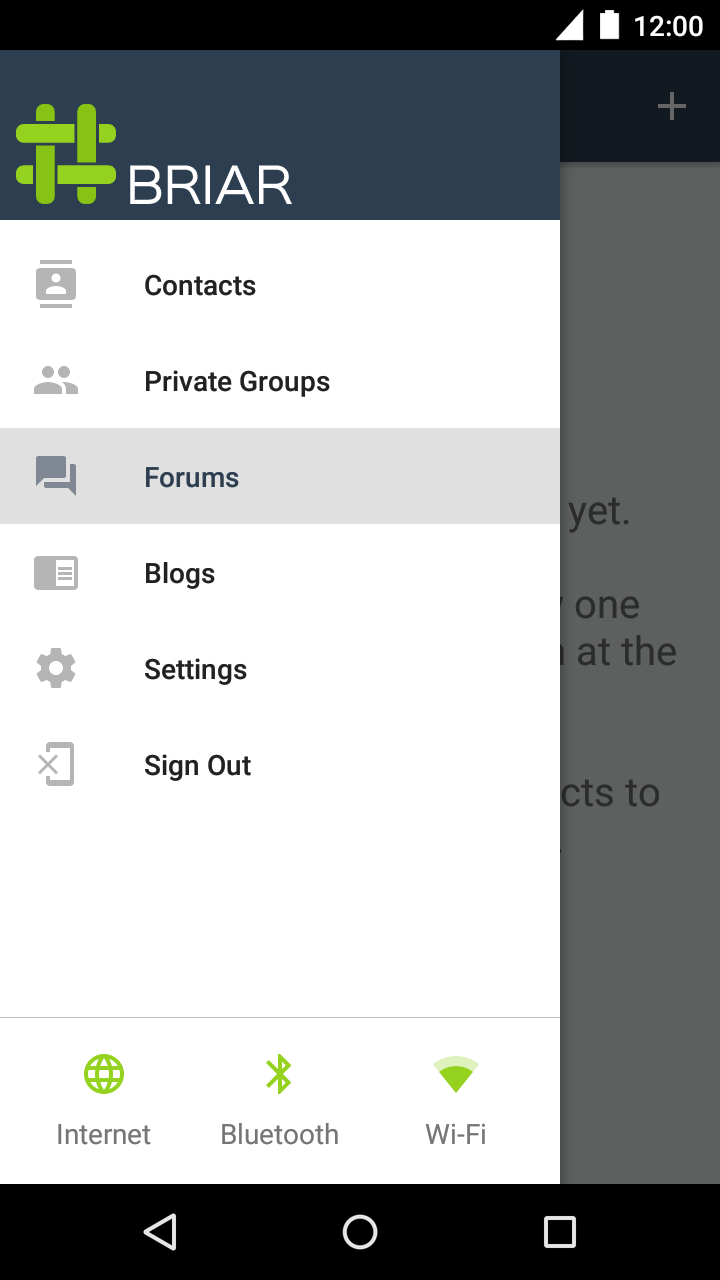
A forum is a public conversation. Unlike a private group, anyone who joins a forum can invite their own contacts.
To create a forum, open the main menu and choose “Forums”. The forum list will open. Tap the plus icon to create a new forum.
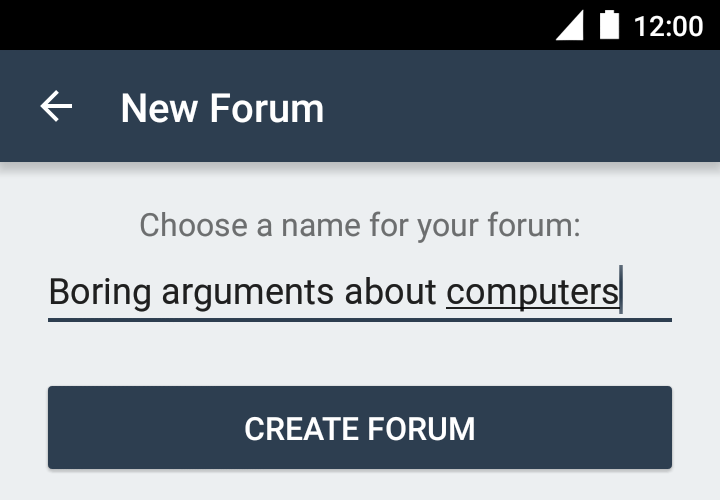
Choose a name for your forum, then tap “Create Forum”.
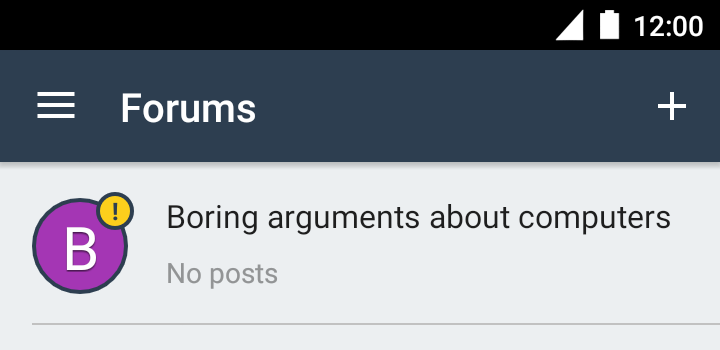
The new forum will be added to your forum list. This list shows all the forums you belong to.

To share a forum with your contacts, tap the forum to open it, then tap the sharing icon.
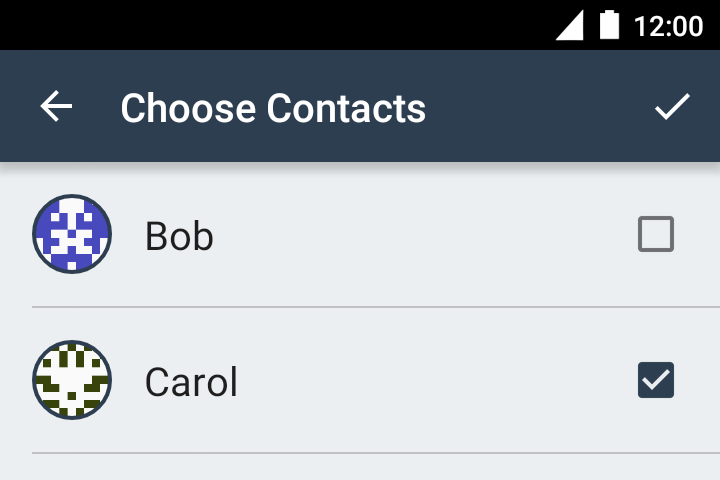
Next choose the contacts you’d like to share the forum with. Press the checkmark icon when you’re done.
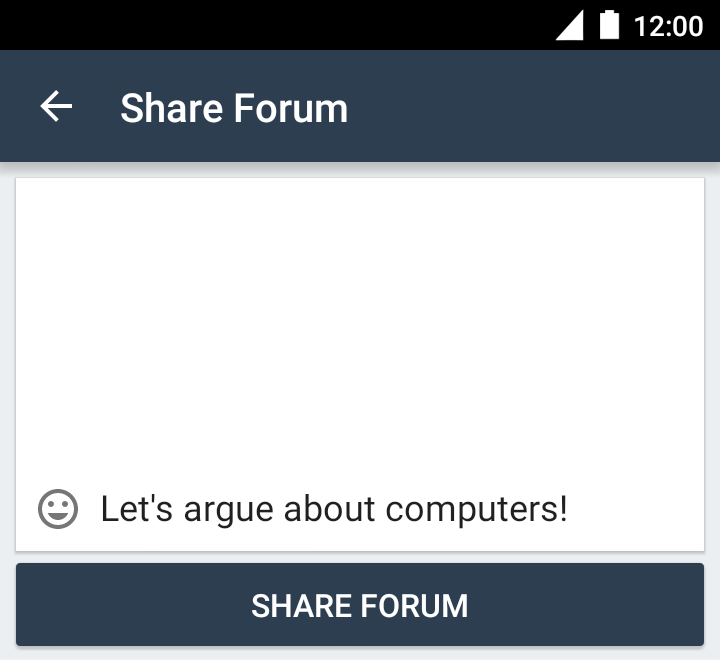
Add an optional message to the chosen contacts, then tap “Share Forum”. The contacts will see a message inviting them to join.
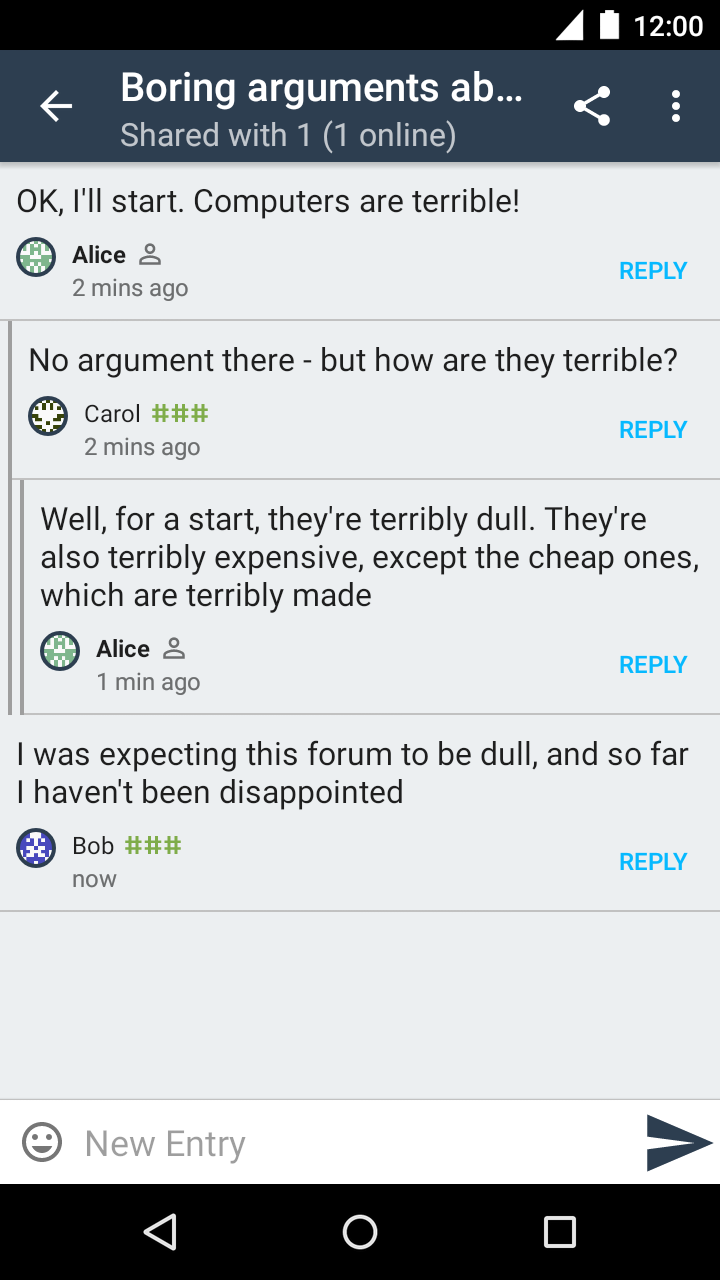
Messages in forums are organized into threads. Any member can reply to a message or start a new thread.
Any member of a forum can invite new members, and any member including the creator can leave the forum. The forum continues to exist until the last member leaves.
Blogs
Your Briar account has a built-in blog. You can use it to post news and updates about your life. Your blog is automatically shared with your contacts, and their blogs are shared with you.
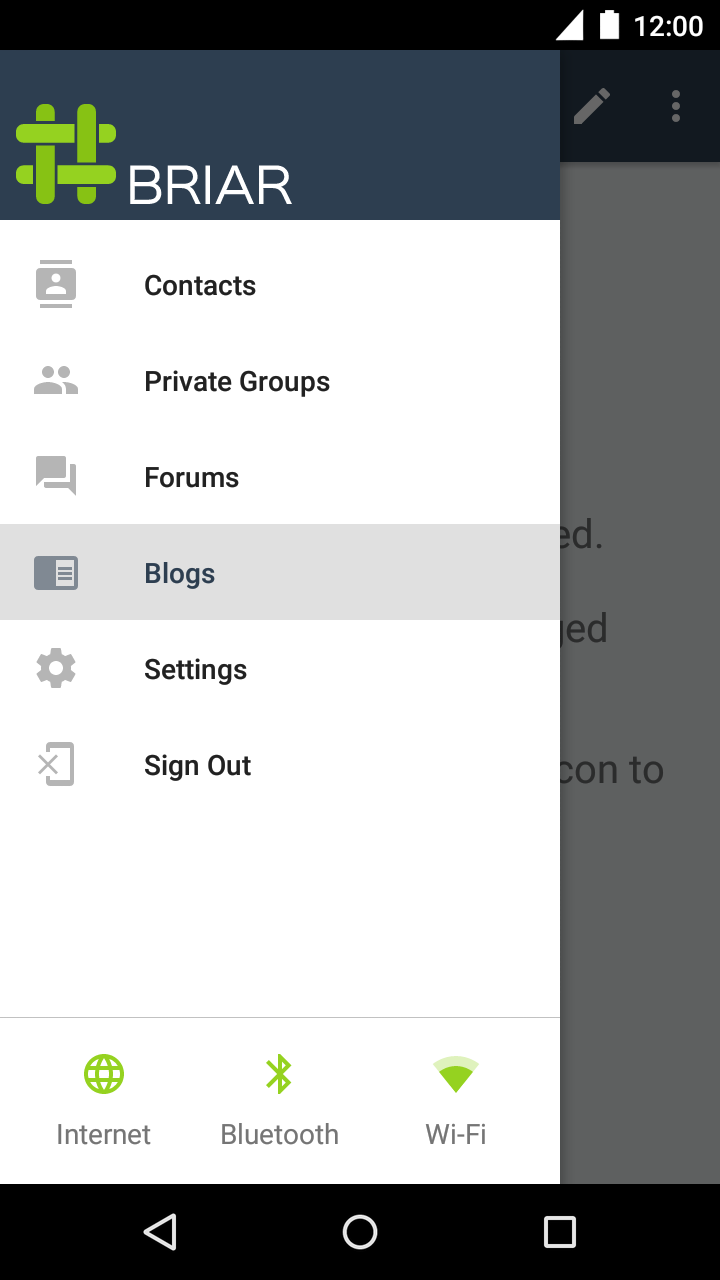
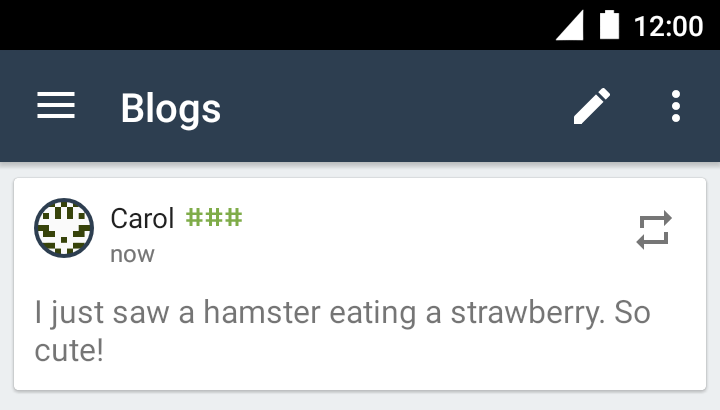
To read your contacts’ blogs or write a post, open the main menu and choose “Blogs”.

To write a post, tap the pen icon at the top of the blog feed.
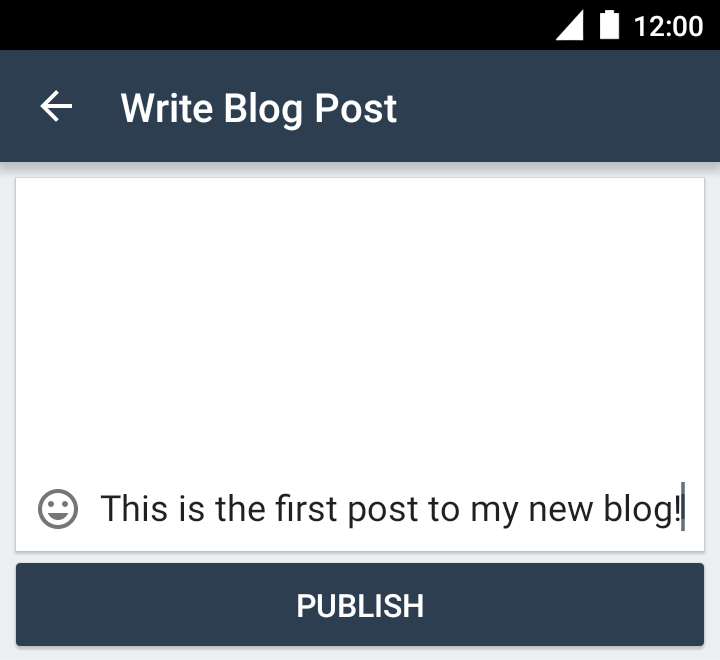
Write your post and tap “Publish”.
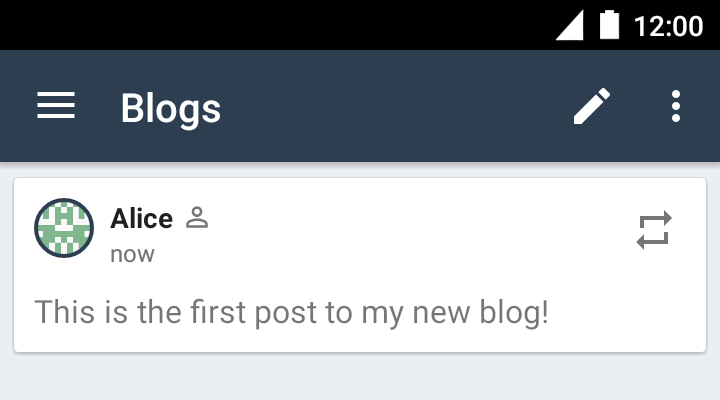
Your new post will appear in the blog feed.
To reblog a post, tap the reblog icon at the corner of the post.
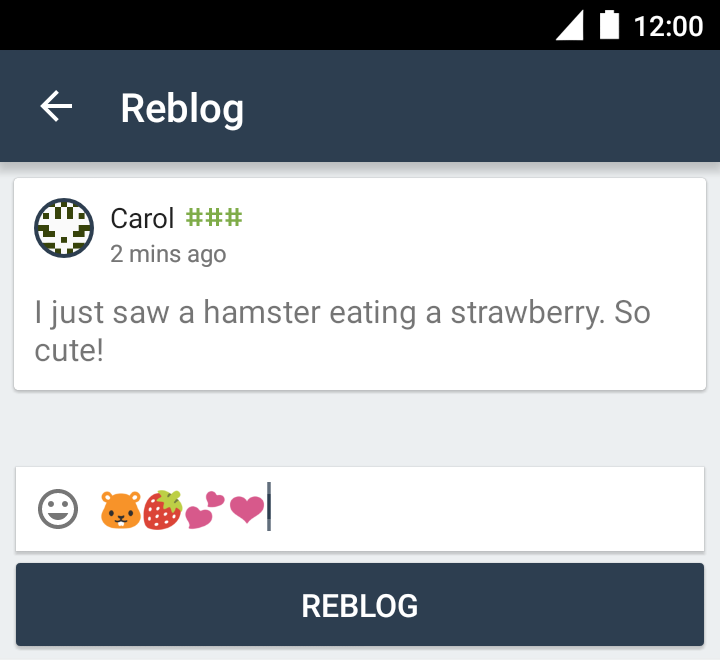
Add an optional comment and tap “Reblog”.
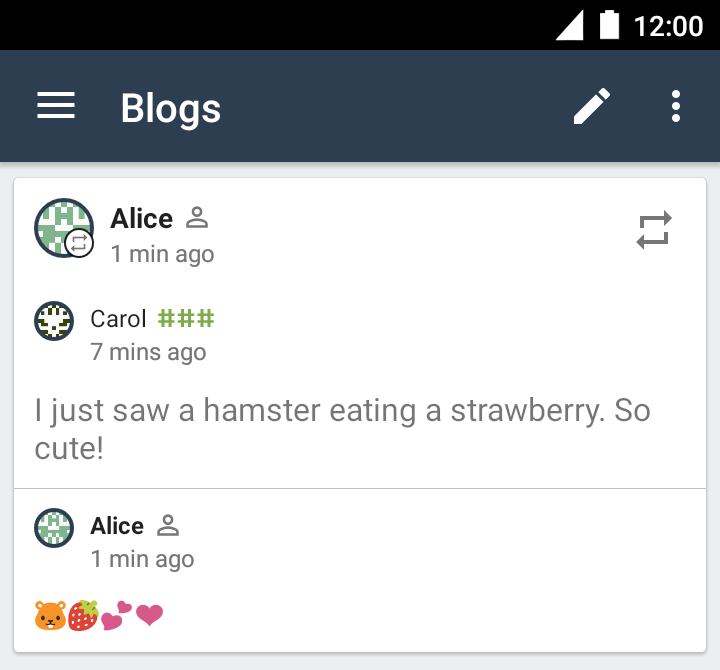
The reblogged post will appear in the blog feed with your comment attached.
RSS Feeds
You can use Briar to read any blog or news site that publishes an RSS feed. The articles are downloaded via Tor to protect your privacy. You can reblog and comment on articles from RSS feeds, just like you can with blog posts.
Tip: RSS is a way for websites to publish articles in a form that’s easy to republish.
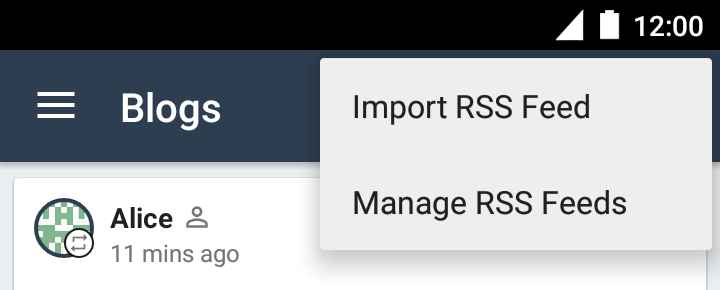
To import an RSS feed, open the blog feed and choose “Import RSS Feed” from the menu.
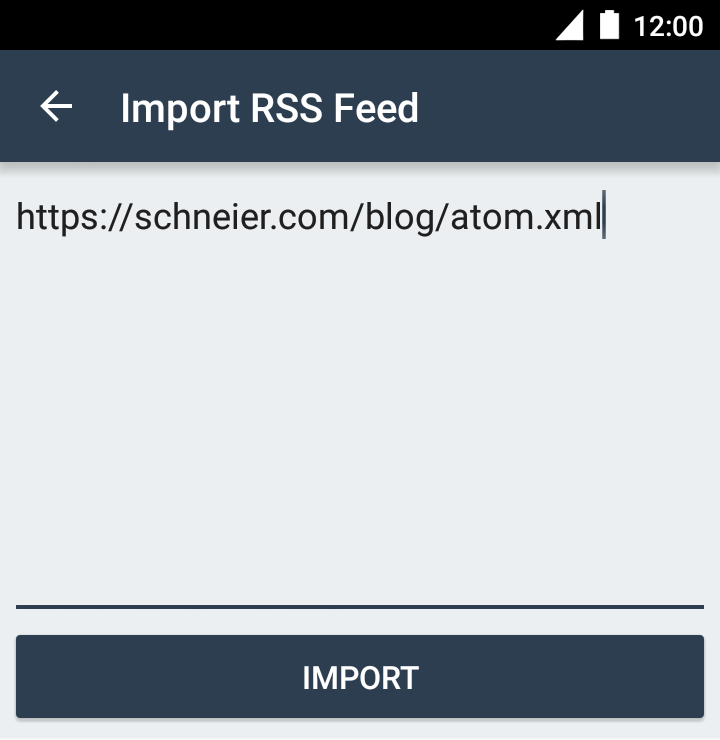
Enter the URL of the RSS feed and tap “Import”. The articles will be downloaded and added to the blog feed. This can take a few minutes.
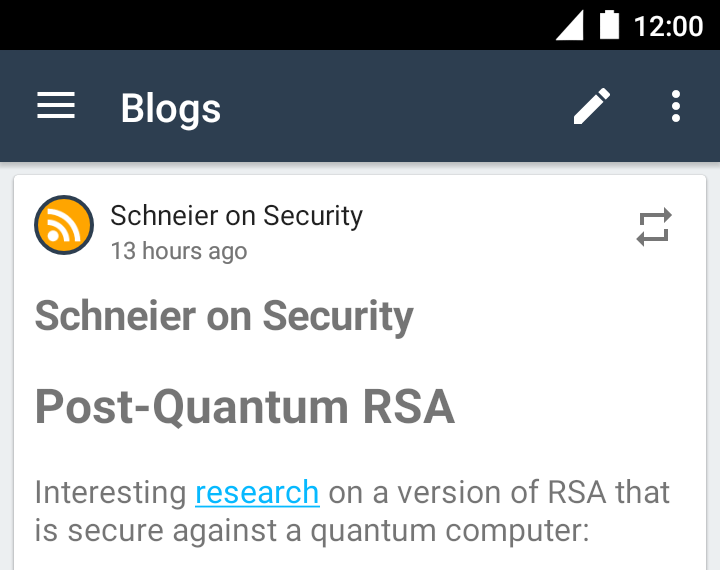
When new articles are published, Briar will download them automatically. Imported articles are not shared with your contacts unless you choose to reblog them.

To manage your RSS feeds, open the blog feed and choose “Manage RSS Feeds” from the menu.
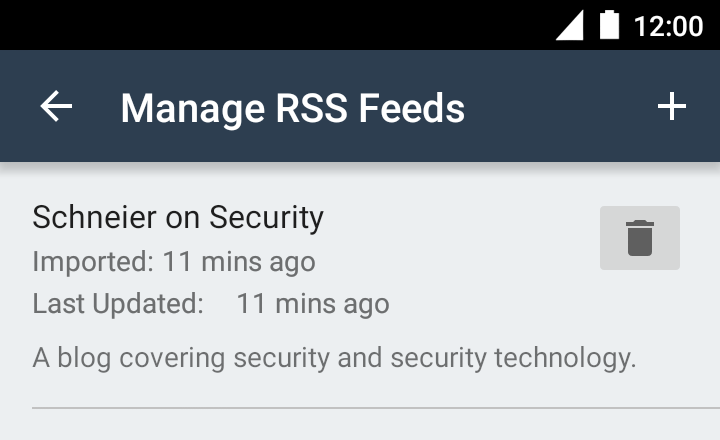
Tap the trash icon to remove a feed. The imported articles will be removed from the blog feed, except for any articles you’ve reblogged.
Deleting Contacts
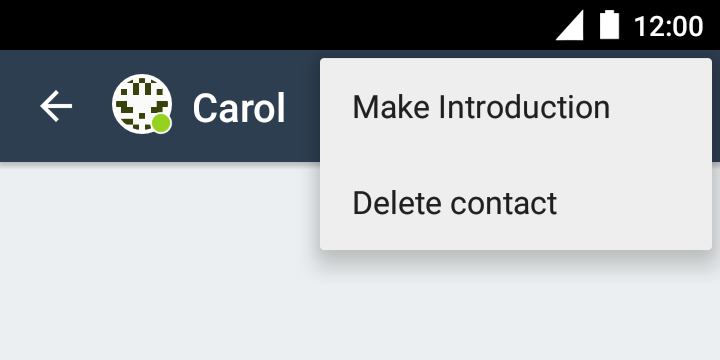
To delete a contact, tap the contact’s name in the contact list and choose “Delete contact” from the menu.
Tip: To protect your privacy, the contact won’t be notified that you’ve deleted them. They’ll just see you as offline from now on.
Settings
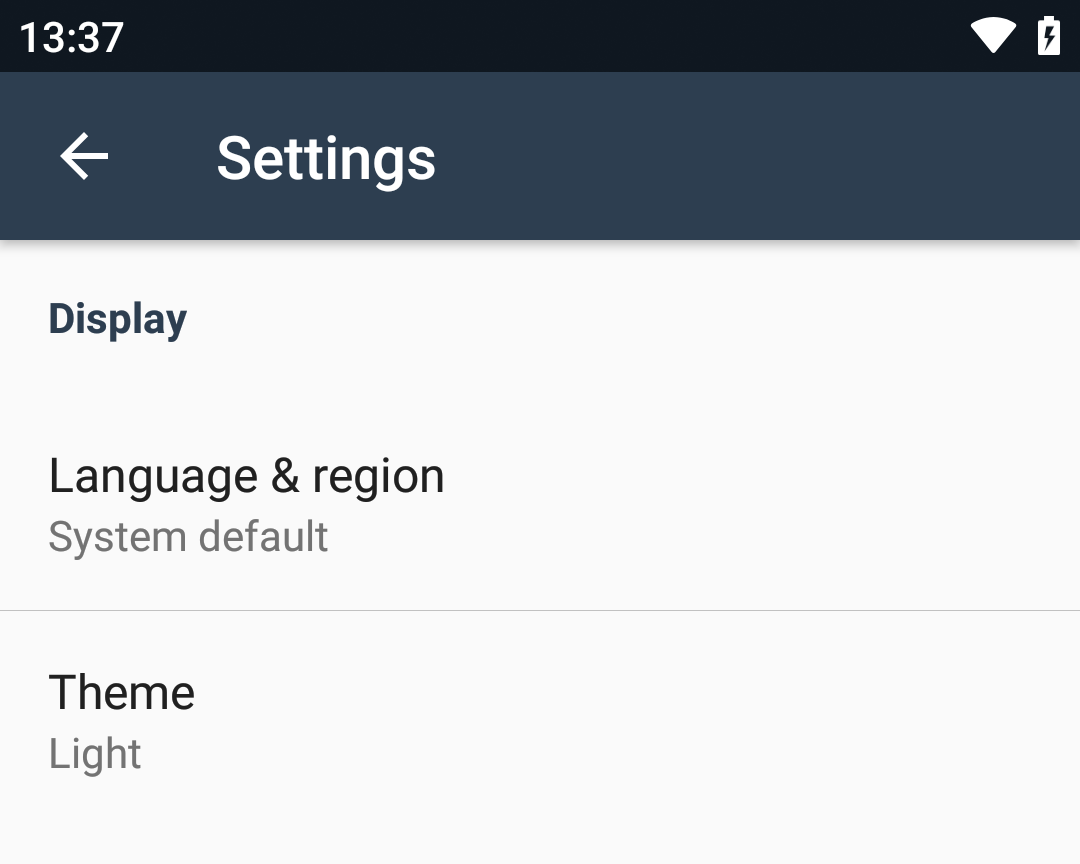
To find the settings, open the main menu and choose “Settings”. Here you can customize your Briar experience.
Theme
You can change the color scheme that Briar uses:
- Light: Briar will use light colors.
- Dark: Briar will use dark colors.
- Automatic: Briar will change its color scheme based on the time of day.
- System default: Briar will use the system’s color scheme.
Connect via Internet (Tor)
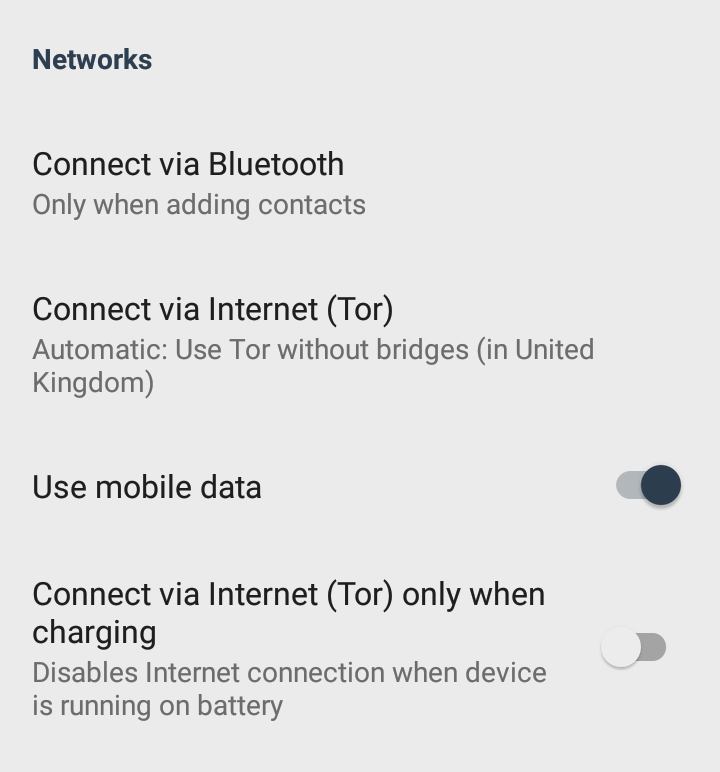
Tip: Briar uses Tor to connect to the internet. Tor is a network of computers run by volunteers around the world to help people access the internet privately and without censorship. “Bridges” are computers that can help you connect to Tor if your government or internet provider is blocking it.
You can control how Briar connects to the internet:
- Automatic based on location: Briar will choose how to connect based on your current location.
- Use Tor without bridges: Briar will connect to Tor without using bridges.
- Use Tor with bridges: Briar will use bridges to connect to Tor.
- Don’t connect: Briar won’t connect to the internet at all.
Use Mobile Data
You can control whether Briar uses mobile data. If you turn off mobile data, Briar will only use the internet when you’re connected to Wi-Fi.
Connect via Internet (Tor) Only When Charging
You can control whether Briar uses the internet while your device is running on battery. If you turn on this setting, Briar will only use the internet when your device is connected to power.
Screen Lock
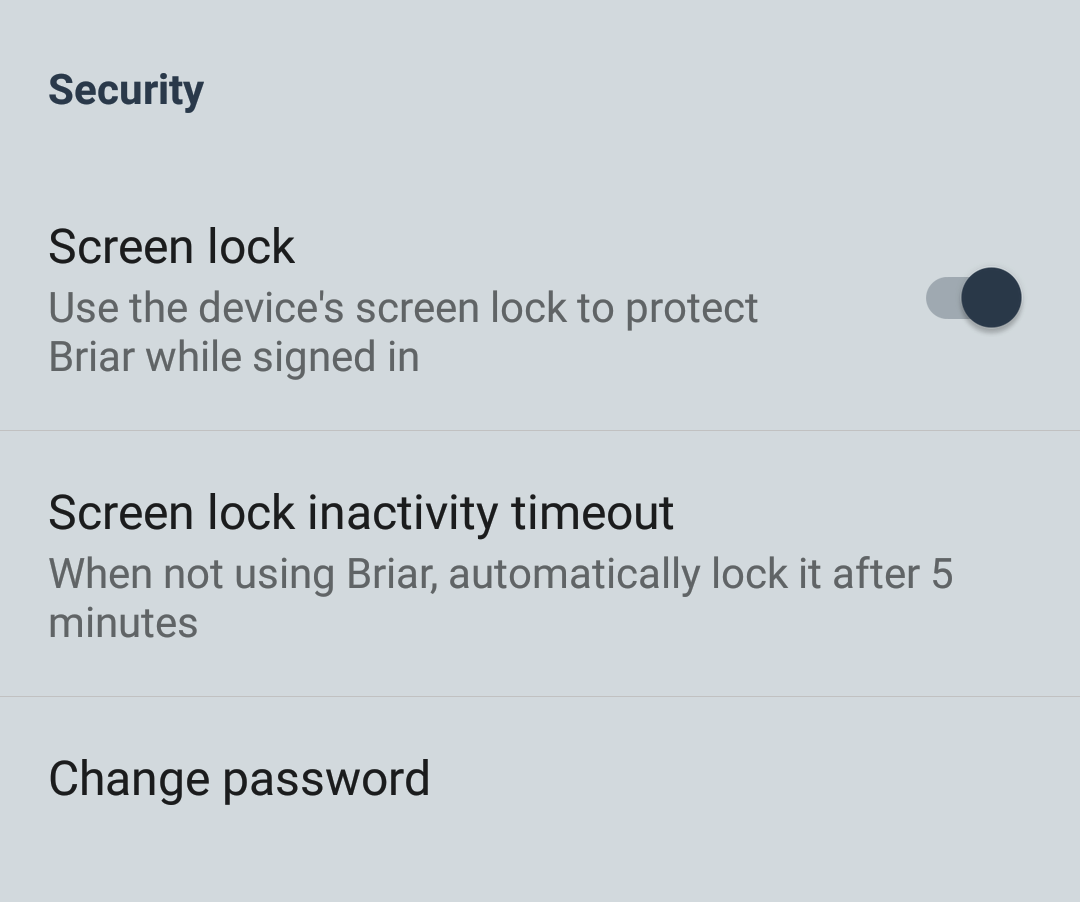
Tip: This feature is not available on Android version 4.
To protect your privacy when other people are using your device, you can lock Briar without signing out. This prevents Briar from being used until you enter a PIN, pattern or password.
Briar uses the same PIN, pattern or password that you normally use to unlock your device, so this setting will be disabled (grayed out) if you haven’t chosen a PIN, pattern or password yet. You can use your device’s Settings app to choose one.
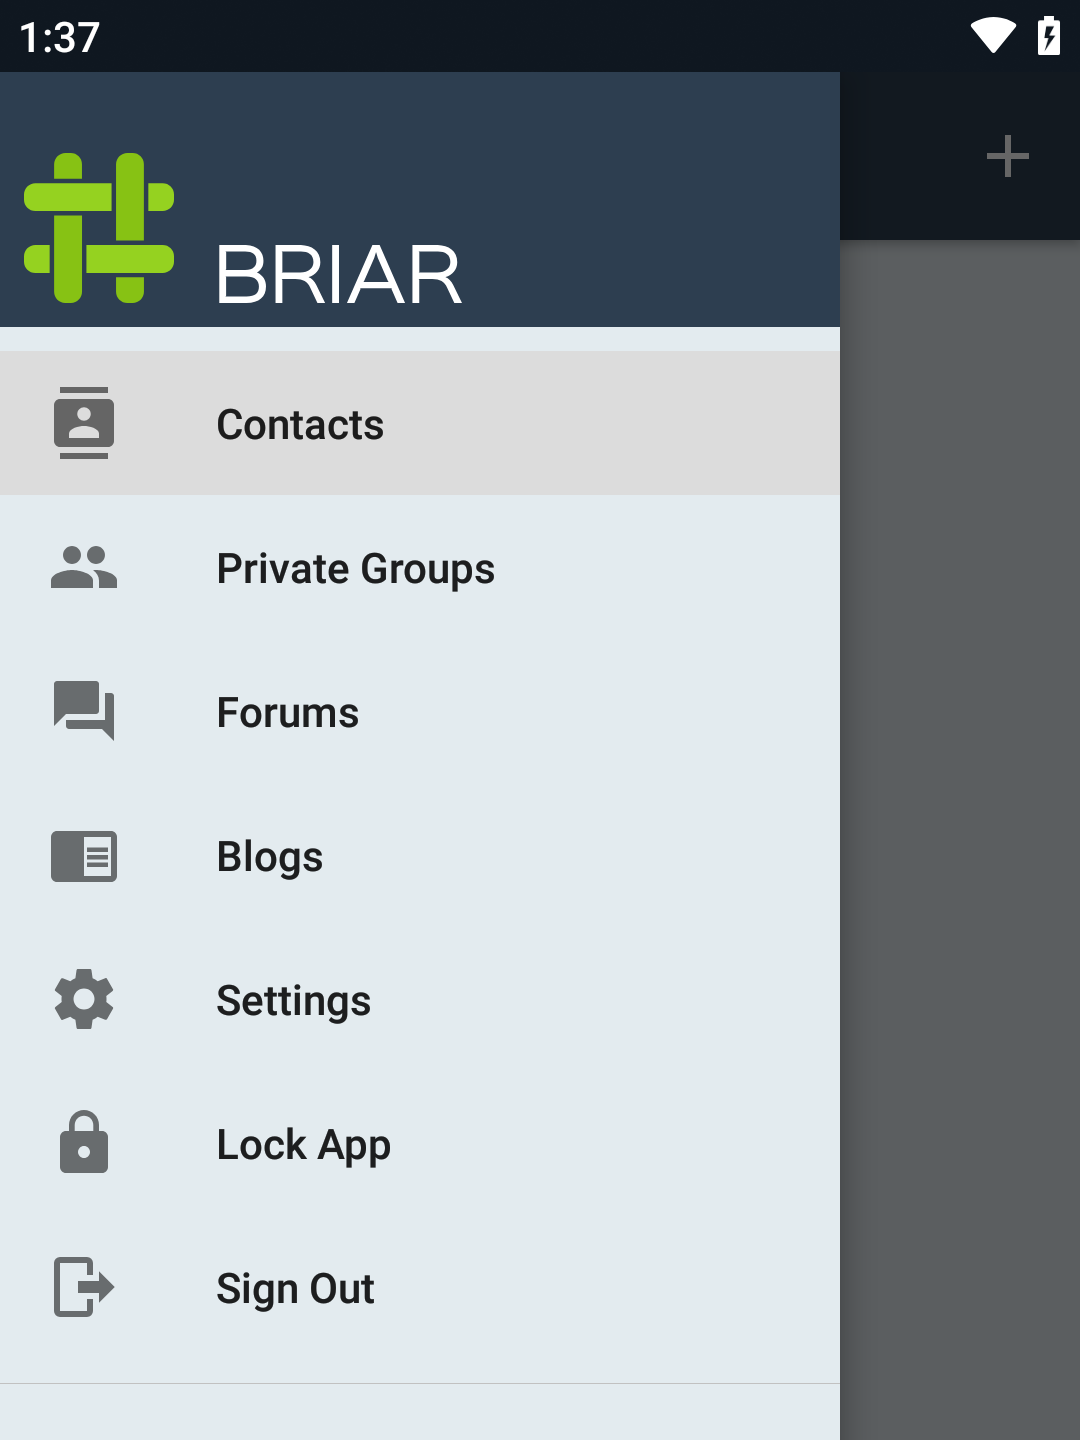
When the screen lock setting is activated, a “Lock App” option will be added to Briar’s main menu. You can use this option to lock Briar without signing out.
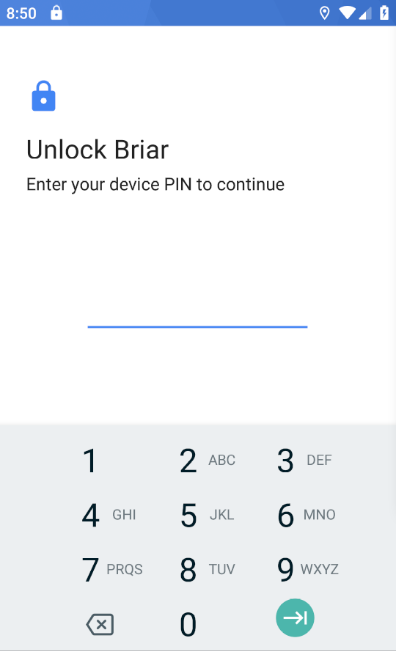
When Briar is locked, you’ll be asked for your PIN, pattern or password to unlock it.
Screen Lock Inactivity Timeout
Tip: This feature is not available on Android version 4.
You can choose to lock Briar automatically when it has not been used for a certain amount of time.